New Year Snowflake Senses: Edible Sensory Play for Autism Families
January is an ideal time for cozy, family-centered sensory play that feels special but still fits into real life for autism families. Edible sensory activities such as snowflake‑shaped yogurt melts, frozen fruit orbs, and cookie dough digs can offer a safe way to combine taste and touch while respecting individual sensory needs. These simple, winter‑themed “autism sensory recipes” are designed for family weekends, supporting connection, exploration, and regulation in a way that aligns with the neurodiversity‑affirming approach of It’s a Sensory World!
Because many children on the autism spectrum experience differences in sensory processing, edible sensory play must be planned with intention and care. This includes selecting familiar flavors, providing a clear visual structure, and prioritizing safety through small, soft portions, close supervision, and respect for individual chewing and swallowing abilities. In a neurodiverse school in Farmers Branch or a similar supportive learning environment, these activities are most effective when children are allowed to lead—choosing how much to touch, taste, squish, or decorate—so they can explore at their own pace while caregivers and educators observe, support, and respond to their cues.
Why Edible Sensory Play in Winter Matters
Winter can bring long indoor days, disrupted routines, and fewer opportunities for outdoor movement, all of which can heighten stress for neurodiverse children and their families. Edible sensory play provides a built‑in way to engage multiple senses—taste, touch, smell, sight, and sometimes sound—while staying safely inside and using everyday ingredients. For some families, it also feels more comfortable than non‑edible sensory bins because there is less worry if a child mouths or licks materials.
Edible sensory play supports several areas at once:
- Sensory regulation: Slow, repetitive motions like scooping, pressing, and stirring can be calming, while cold or crunchy textures can provide alerting input.
- Oral exploration: For children who are hesitant eaters, experiencing new textures during low‑pressure play (without any requirement to “take a bite”) can build familiarity and reduce anxiety over time.
- Social connection: Cooking and play in the kitchen naturally invite turn‑taking, watching others, and sharing materials, which can support social skills in a relaxed environment.
At the same time, edible sensory play can be adapted easily for specific needs. Parents and caregivers can adjust flavors, temperatures, and textures, offer utensils instead of bare hands, or provide visual schedules that show each step. That flexibility makes these “autism sensory recipes” a strong fit for family‑oriented winter weekends.
Safety and Sensory Considerations
Before diving into recipes, it is important to think about safety and sensory comfort. Autism is associated with a wide range of sensory profiles, so what is enjoyable for one child may feel overwhelming or unpleasant for another. Taking a few minutes to plan around individual needs helps the activities feel more successful and respectful.
Key safety considerations include:
- Always supervise children closely, especially around small pieces, frozen items, or hard textures.
- Consider any swallowing difficulties, chewing challenges, or medical conditions when choosing ingredients and sizes.
- Check for food allergies and intolerances (such as dairy, gluten, nuts, or food dyes) and adjust recipes accordingly.
- Be thoughtful about choking risk; cut fruit or dough shapes to appropriate sizes for the child’s age and abilities.
Sensory considerations are just as important:
- Some children may prefer warm or room‑temperature food over cold; others may seek the intense cold of frozen textures.
- Sticky or gooey textures can be delightful for sensory seekers but overwhelming for sensory‑avoidant children, who might benefit from using gloves, utensils, or limiting direct contact.
- Strong smells or flavors may be aversive; families can start with mild, familiar tastes (such as plain yogurt or favorite fruits) and gradually offer small variations.
Above all, children should have full permission to opt in and out of specific steps. A child who only wants to watch, stir once, or decorate without tasting is still participating meaningfully, and their boundaries should be honored.
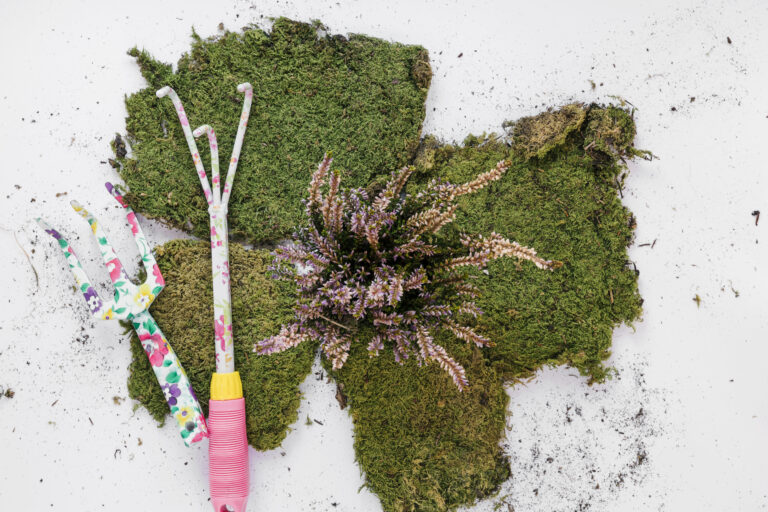
Snowflake‑Shaped Yogurt Melts
Snowflake‑shaped yogurt melts are a visually appealing and gently crunchy‑then‑melty treat that pairs oral sensory input with simple fine‑motor work. The snowflake shapes bring a winter theme to the table, while the yogurt base allows for customization with different flavors, colors, and add‑ins. These melts can be served straight from the freezer for a firm, cold experience or allowed to soften slightly for a creamier bite.
Ingredients
- Full‑fat yogurt (plain or flavored; Greek yogurt works well for a thicker texture)
- Optional natural sweetener (such as a small amount of honey or maple syrup for children over age 1, if the family uses these)
- Optional mix‑ins: fruit puree, finely mashed berries, or a small amount of vanilla extract
- Silicone snowflake‑shaped molds or a baking sheet lined with parchment paper
- Optional topping for texture variation: finely crushed cereal, graham cracker crumbs, or tiny fruit bits
Basic method
Begin by stirring the yogurt in a bowl until it is smooth, then decide whether to add a sweetener or pureed fruit. For children who prefer familiar tastes, using a yogurt flavor they already enjoy can make the activity less intimidating; for those who like novelty, mixing yogurt with a small amount of berry puree may be exciting. Once mixed, adults can help pour or spoon the yogurt into silicone snowflake molds, inviting children to practice scooping, squeezing, or leveling the surface.
The molds are then placed in the freezer until firm, usually for a few hours or overnight. When it is time to play and taste, the snowflakes can be popped out and arranged on a cold plate or tray. Children can explore with fingers first—tracing the snowflake edges, tapping them together to hear light sounds, and noticing the shift from solid to softer as the yogurt warms. Those who want to taste can lick, nibble, or take bites at their own pace.
Variations for sensory and dietary needs
Families can adjust snowflake yogurt melts in several ways to better match their child’s profile:
- For dairy‑free diets: Use coconut, almond, or soy yogurt instead of dairy yogurt.
- For less intense cold: Let the melts sit at room temperature for a few minutes before serving so they soften faster.
- For more visual appeal: Swirl two colors of yogurt (such as plain and berry) in each mold to create marbled snowflakes.
- For extra texture: Sprinkle a light layer of finely crushed cereal or cookie crumbs on top of each snowflake before freezing.
Children who are hesitant to touch cold items may prefer using a small fork or toothpick (if safe) to move snowflakes around, or they might start by decorating them with tiny fruit pieces while an adult holds the tray. The goal is to frame the activity as playful exploration, not a requirement to eat.
Frozen Fruit Orbs
Frozen fruit orbs are small, round bites of fruit that can be enjoyed as snack, sensory exploration, or part of a winter‑themed “ice treasure hunt.” The spherical shape invites rolling, scooping, and sorting, while the frozen texture provides distinct temperature and pressure feedback when bitten or held. These orbs can be made from whole small fruits or fruit pieces frozen with water or juice.
Ingredients
- Small fruits such as blueberries, grapes (halved for safety), or melon balls
- Alternatively, chopped fruit pieces like mango, banana slices, or strawberries
- Water or 100% fruit juice
- Round silicone molds or ice cube trays (small sizes work best)
- Optional: a pinch of lemon juice to brighten flavor, or a tiny amount of sweetener if desired
Basic method
For whole small fruits (like blueberries), the simplest version is to rinse and dry the fruit, then place it in a single layer on a parchment‑lined tray and freeze until firm. For a “true orb” experience, families can use small round molds: fruit pieces are placed inside each cavity, then covered with water or juice before freezing. When ready, the frozen orbs are popped out and placed in a shallow dish or sensory bin.
Children can roll the orbs around with their fingertips, listen to them clink in bowls or metal pans, and watch them slowly melt into colorful puddles. For those comfortable with eating them, the orbs can be tasted straight from the freezer for a crunchy, icy bite or allowed to thaw slightly for a softer nibble. Adults can talk about temperature (“cold,” “colder,” “melting”), color, and texture, turning the activity into a gentle language and science exploration.
Variations and play ideas
Frozen fruit orbs can be easily tailored:
- For softer textures: Use banana slices or mango pieces, which remain creamier even when partially frozen.
- For more crunch: Choose firmer fruits such as grapes (cut to age‑appropriate sizes) or blueberries.
- For a “snow and ice” theme: Place frozen orbs in a bin with crushed ice or finely shaved ice, and let children dig with spoons, cups, or measuring scoops.
- For children who avoid sticky hands: Offer tongs, spoons, or small scoops instead of encouraging direct hand contact.
Families can also incorporate simple “treasure hunt” elements by gently hiding the orbs beneath a thin layer of ice or crushed cereal, inviting children to search, scoop, and rescue them. For some children, the focus will be entirely on the tactile experience; others may be more interested in tasting their favorite fruits in this new form. Both are valid ways to participate.
Cookie Dough Digs
Cookie dough digs bring together the sensory appeal of a soft, moldable material with the comfort of familiar flavors. The idea is to create an edible dough—either standard cookie dough intended for baking or a no‑bake, egg‑free version—that can be used as a “dig site” for small edible add‑ins like chocolate chips, mini marshmallows, or cereal bits. Children can scoop, bury, and uncover items, experiencing both the squishiness of dough and the textures of the hidden treasures.
Ingredients (basic no‑egg dough)
- Flour that has been heat‑treated for safety (briefly baked and cooled) or a safe alternative like oat flour
- Softened butter or dairy‑free butter substitute
- Sugar (granulated and/or brown sugar, depending on flavor preference)
- A small amount of milk or dairy‑free milk, as needed for texture
- Vanilla extract
- Optional: a pinch of salt
- Edible “treasures”: mini chocolate chips, small cereal pieces, sprinkles, or mini marshmallows
Families can also choose a pre‑made cookie dough that is labeled safe to eat raw (or designed as an edible dough) if that is easier and aligns with dietary needs.
Basic method
If making dough from scratch, the butter and sugar are creamed together until soft, then mixed with vanilla. The flour (already heat‑treated if needed) is added gradually, with small amounts of milk used to reach a soft, pliable consistency. Adults can adjust the texture: some children prefer firmer dough that holds shape, while others may like a softer, more squishable mix.
Once the dough is ready, it can be spread in a shallow dish or divided into individual bowls. The “treasures” are then mixed in or buried: adults can hide small handfuls of chocolate chips or cereal pieces beneath the surface for children to find. During play, children can dig with spoons, presses, or their fingers, making paths, tunnels, or simple shapes. Those who want to taste can take small bites or lick a finger, while others may simply enjoy the tactile experience.
Variations and supports
Cookie dough digs are highly adaptable:
- For gluten‑free needs: Use gluten‑free flour or oat flour, checking labels carefully.
- For less sweetness: Reduce sugar and emphasize texture rather than taste; some families may prefer an oat‑based dough with a mild flavor.
- For more structure: Offer cookie cutters so children can press shapes into the dough, then decorate them with the “treasures” instead of digging.
- For children who dislike sticky textures: Provide gloves, small rolling pins, or tools so they can interact without direct skin contact.
Families who wish to bake the dough afterward can shift the activity into a full cooking experience. In that case, supervising adults should shape or reshape cookies to ensure even baking and follow a recipe designed for cooking rather than eating raw. For some children, knowing that their creation will become a warm cookie later adds motivation; for others, keeping it as a pure sensory activity works better.
Making Weekends Family‑Centered and Flexible
Scheduling these recipes for weekends can help families create a rhythm that feels special but not overwhelming. One weekend might focus on snowflake yogurt melts; another might be devoted to frozen fruit orbs or cookie dough digs. Repeating a favorite activity several times across the winter lets children become more comfortable with the steps and textures, promoting a sense of mastery and predictability.
A family‑oriented approach means building in roles for everyone. Younger siblings might be in charge of sprinkling toppings, while older children measure ingredients or set up trays. Caregivers can support engagement by breaking tasks into small steps and offering simple choices: “Do you want to pour, or do you want to stir?” or “Should we make blue snowflakes or plain white ones today?” This shared decision‑making not only supports autonomy but also helps children feel valued as collaborators.
At the same time, flexibility is essential. Some weekends, a child might only manage a few minutes of participation before needing a break; other weekends, they may stay engaged for a long stretch and even ask to repeat a step. Families can normalize this variation and treat these activities as invitations rather than obligations, reinforcing the message that all participation—watching, touching, smelling, or tasting—is valid.
Connecting Edible Sensory Play with Its a Sensory World!
The mission of It’s a Sensory World! centers on supporting neurodiverse children and young adults through customized, sensory‑based learning and recreation. Edible sensory play at home complements that mission by giving families practical tools to bring similar principles into their own kitchens and living rooms. While the website highlights structured programs, camps, and school‑readiness offerings, these recipes extend the same values into weekend routines.
Families who resonate with winter‑themed “autism sensory recipes” may also be interested in broader sensory education, social skills support, or community programming. Activities like yogurt melts, fruit orbs, and cookie dough digs reflect the same core ideas: honoring sensory needs, building skills through play, and centering joy and connection. Over time, these small, repeated experiences can help children feel safer experimenting with new textures and tastes, while strengthening trust within the family.
As the New Year unfolds, snowflake‑shaped treats and edible dig sites can remind families that growth does not have to come from big, sweeping resolutions. Instead, it can come from small, sensory moments shared together—cold yogurt melting on warm fingers, fruit orbs rolling across a tray, dough squishing between curious hands—each one a step toward greater comfort, confidence, and connection.